How To Start Garden Seeds
Getting a jump-start on your garden is a great idea for many reasons. By starting your seeds indoors, you can extend your growing season (helpful if you live in cold climates with short seasons), sneak in an extra harvest round (ideal for warm climates with longer seasons) and save money by buying seeds instead of transplants. Some vegetable and flower seeds should be directly sown, which means you won’t be able to start them indoors. But there are plenty of seeds that can be started indoors, so don’t worry! Keep reading to learn how to start seeds indoors, how to properly care for seedlings, and how to easily germinate seeds at home.
How To Start Vegetable & Flower Seeds Indoors
- Start with high-quality seeds. For the best crops, look for organic and non-GMO seeds.
- Get the right soil. We recommend looking for (or creating your own!) seed starter mix. You do not want to use regular soil as it is not formulated for seeds.
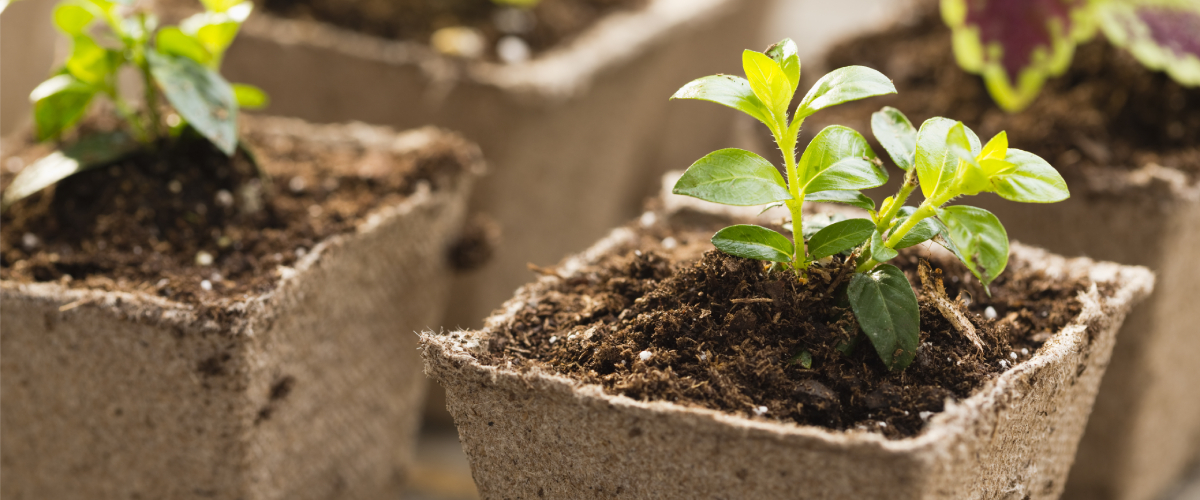
- Get the right containers/pots. You will need a container or pot that allows drainage, so be sure whatever you choose has holes at the bottom.
- Once you have all your supplies, learn how deep to plant your seeds. The general rule of thumb is to plant seeds two to three times deep as they are wide. You can also consult your seed packet for the exact depth.
- After planting your seeds at the right depth, you need to water them gently. Be careful not to water the seed so forcefully that you move it from your precise planting depth.
- Next, move your seeds to a warm location, such as on top of a refrigerator, radiator, or any other warm appliance. Near your oven is a good option, but you may need to move seedlings if the oven gets too hot as too much heat can damage them.
- Now you wait a little bit. Keep checking your seedlings each day for signs of growth. Once you see them emerge, it’s time to move them again!
- Move seedlings to a bright, sunny location. If that is not available to you or you want to be more consistent, add a fluorescent light. Pro Tip: Keep the room your seedlings are in at a cooler temperature. This will cause the seedlings to grow sturdier and be more ready for their coming transplant.
- Keep an eye on your seedlings and rotate them to ensure even growing. If you use a grow light, be sure to adjust the height as seedlings grow.
- Start fertilizing seeds once a week when you start seeing leaves. Use a fertilizer that is not full strength to avoid damaging the seedlings.
- You will start to see multiple seedlings sprout up. As this happens, start to thin seedlings so there is only one per pot. You can do this by cutting the seedling you want to get rid of at the base and tossing out the clippings.
Transplanting Seedlings Correctly
Once seedlings get their second set of leaves, it is time to transplant. As always, use care and be gentle when transplanting seedlings.
- Carefully move seedlings to individual pots. You’ll want to use potting soil for this move as well as compost for a nutrient-rich soil.
- Once planted, water well, but again, try not to use high pressure or forceful watering. Keep out of direct sun as the seedlings acclimate to their new home.
- Before moving seedlings outdoors, you will need to start the “hardening off” process, which means you are preparing them for the outside world. Start by stopping your fertilizing and reduce your watering.
- Roughly a week before planting them outside, put your seedlings in a shaded area protected from wind for a few hours each day. Every couple of days, move your seedlings so they get more sun and wind exposure. During this time, keep soil moist to prevent plants from drying out.
- After hardening off your seedlings, it’s time transplant them to the garden plot. Schedule this during an overcast/cloudy day or in the morning when the sun is not in full force.
- Transplant seedlings into loose, well-draining soil.
- Once you’ve planted the seedlings, water them thoroughly. If needed, you can add a layer of mulch to help retain moisture. We also recommend adding a mixture of starter fertilizer and water to the seedlings to ensure the soil has adequate nutrients available.
How Often To Water Seedlings
From start to finish (and after!), make sure your seedlings are getting enough water. You do not want your seedlings to dry out at any point during the process. As you move or transplant seedlings, be sure to water them well to help them acclimate.
In general, you will need to water your seedlings every day or every other day until you move them outside. Once they are planted outside, you can decrease waterings to three times a week. If you live in a hot or dry climate, you may need to water more; otherwise, this frequency should be perfect.
How To Germinate Seeds
Get a jump-start on growing your seedlings by germinating the seeds before planting them. This process typically only takes about 24 hours and is easy to do. We recommend using the following paper towel method as it is the easiest and you probably already have all the supplies:
- Paper Towel Method: You will need a container with a lid, paper towels and a seedling heat mat. Start by dampening a paper towel. Place the seeds in a line on one side of the paper towel and fold over the other side to cover them. Put the seeds in the container and cover with the lid. Put the container on the heat mat or other warm surface. If you don’t have a heat mat or other warm surface, that is fine; it will just take your seeds longer to germinate. Put seeds in a dark area or room and check back in a day. Once you see a root, they are done and ready to be put in soil.
|
|
|
